10 Easy Steps to Blow up Fonts

One of my favorite things to do on an empty wall is blow up quotes! I'm here to show you a quick tutorial on how to blow up fonts and making a boring wall have a pop of excitement. 

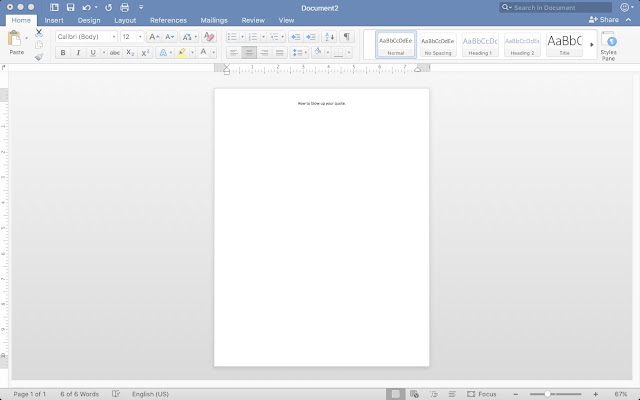
1. I find it the easiest to do this in Microsoft Word. Make sure to open up a new blank document and have your quote ready! 

 2. Your first step is to go into your Margin settings. From my computer I go to 
Layout> Margins> Narrow. This just gives you a little extra room to work with when blowing up your font. After you have your margins set to narrow, then type in your quote. 


3. Highlight your entire quote, and center it on the page. Once it is centered, change it into any font that you would like to use. For this tutorial I chose LD What did I say?. To download my Endless Growing Font Bundle click here


4. Then depending on the font that you pick you will now change the size of the font so that it fits 1 letter on each page. In this tutorial I used the size 650. In other fonts it might be smaller or larger. It also depends on how big you want your quote. 


5.  I then make sure that that there is one letter to each page. (If you are printing on white paper or all the same color paper, it doesn't matter if all the letters are all on one page. If you are making a rainbow quote you will want one letter on each page.) * You can change the size of 1 letter if it doesn't fit on the page completely. Sometimes I have to make my m and w's smaller than the other letters. 


6. You will then change the color of each letter to the color that you want the letter to be.  I use the font color button when changing the letter coloring. (The A with the purple color underneath)


If you are printing all on 1 paper color you can skip Step 7 and 8 and head directly to 9. If you are printing on rainbow paper this is going to be the most important part! 

7. Move all of the same color letters side by side. If you have some that will fit on the same page, put them together now. 


8. If you are printing on Rainbow paper you now need to count out how many pages you need for each color. This is very important! You also need to know your printer, I would have to personally start with purple on top but you might have to start with red on top. 

9. Select all of your text and go back up to the text buttons. Click on Text Effects, the white A with the blue outline. I think go Outline> and change the color to black. 


10. Now go back and change your font color to white using the font color button. 
(A with purple underneath)


10. We will change the outline of the font so that it is easier for you to cut out. This again will depend on the font that you have chosen and the thickness that you desire. Go up to the font buttons and click on the Text effects button. Go to Outline> Dashes> More Dashes. Then change the width of the dash to 10 pts. or the size of your choice. 

Just like that you are ready to print. Again know your printer and which color you need on top. If you are printing on white or all one color, you have it easy! I printed at least twice before I got all the letters right!

If you need help please email me and let me know how I can help! I hope this has been easy for you to follow and that it helps you give your classroom a wall popping quote! 

1

Summer Prep

If you are a true teacher at heart you know that the #teacherbrain never shuts off! It's truly a problem and the closer to we get to the start of a new school year the crazier our #teacerbrain gets! It's the time when we need a notebook next to the bed, for the middle of the night and something to write with in the shower, because that's of course where we think up our best ideas!  


Every summer I give myself a few weeks to recoup from the previous school year. I usually say I will do absolutely nothing during the month of June.  I spend a lot of time with my Tiny Human in the pool and doing fun things! I try my hardest to not think about school and the things that have to get done before the next year starts. 

Starting the July I'm off running. You can find me waking up early to be the first in line at the Target Dollar Spot. I'm making never-ending to do lists that will never get finished when I want them done. I'm printing, cutting, laminating, the list goes on and on... I'm searching Amazing for amazing steals for the next year. Hoping and crossing my fingers that the laminating pouches will drop in price before I run out again. Teachers Pay Teachers is my first search in the morning. I make my coffee and sit down with my computer making sure I'm not missing a sale or anything I can convince myself to buy. 

I thought that I would share just a few things that I keep at home during the summer. This makes my life so much easier! By keeping things at home I'm not completely rushing in August to get everything ready last minute. I know that there are so people that think I'm CRAZY for working at home during the summer but it's just how I operate. This summer is a little different because I'm going from General Education to Special Education. I'm busy making hands on activities and creating a BRAND NEW CLASSROOM THEME. **Oh jeez, what was I thinking?!?!**

Anyway, I'll start by saying I use my HP Instant Ink a lot during the summer! I go over my page limit every month! So, my favorite thing to use year round is my HP Instant Ink printer. I love it because it sends me ink before I run out! That's probably  why I always go over my page limit, I don't have to run to the store to get ink! 

That leads to cardstock. I try to stick with the Astrobrghts Cardstock. I spent a couple of hours earlier in the year picking out the PERFECT combination for my room this year. I made sure to purchase all the colors and 5 reams of plain white. 

Once everything is printed a cut it all out with my AMAZING new paper cutter! I don't know why I never bought one before. This thing saves my life! I use my scotch scissors to help me cut the smaller things and the corner rounder to get those perfect edges. ** I'm a little OCD** 

Once everything is cut it's time to laminate. I have the Scotch Thermal Laminator and watch for the Scotch pouches to go on sale. Now, with that being said I do NOT laminate everything on my laminator. I take a lot to school and do it on the school machine. It really just depends on what I'm using it for. *Here's a hint. I use glue sticks to glue the paper to the laminate pouch before running it through the laminator. It just helps keep it in place. 

Last but not least I'm making a TON of file folder activities for my kids. I had to by the PERFECT combination for my classroom. I also make sure to have velcro dots on hand to help make sure that all my activities are completed. 

Now here's the real deal... usually when I'm prepping I'm sitting on my couch watching reality TV after the Tiny Human is fast asleep. Let me tell you that an hour or 2 a night really adds up. When he is a awake and busy I'm working on my computer on my Welcome Packet, supply list, easy simple things. I try to knock out one a day every other day. 

Does everything get done before the first day or school? NOOOOO! I try my hardest though. Summer is about reenergizing and spending quality time with my Tiny Human, friends, and family. It's a time where I can think about nothing of importance. It's when I give my brain a well needed break. If I don't feel like working on school stuff, well I don't. It's not going to hurt. What's going to hurt is being burnt out before the school year even starts. 

I hope that you are enjoying your summer and making the most of it, but if you are working on next school year, I hope that I have left you with some easy things to help your summer. Below I have left some links that will help make your summer prep easy. 


0

Hello Fresh

Cooking has never really been my thing. I have tried so hard to turn into the person that cooks most nights a couple nights a week. I have tried freezer meals, meal planning, having weekly shopping lists sent to me... I HATED THEM ALL! 
Being a teacher and a mom I'm busy. By the time I've wrapped up the school day, drove home, unpacked my child and the things that I TOLD myself I was going to work on at home knowing that I really wasn't got to take anything out of the bag, finished homework, started laundry, and given the tiny human a bath, well I don't want to do anything but sit on my couch and watch reality tv. 

Then I found Hello Fresh. 

PLANS
I tried my first box from a friend that was giving out freebies. I picked the Classic Plan for 2, 3 meals a week. I figured one serving for dinner and one for lunch the next day. The tiny human only eats the chicken meals (insert eye roll). The also have Family Plans, and Veggie Plans to choose from. You can do 3, 4, or 5 meals a week. You can definitely choose the right plan for you and edit your plan when ever you wish! *Prices do depend on your plan and how many deliveries you get a week. 

RECIPIES
It was the fun part, picking a recipe! 
Variety- New ingredients and techniques for something a little different but still doable
Fit- Quick and nutritious meals for under or around 650 calories per serving
Quick- Quickest and easiest recipes to help cook a well-balanced meal
Seafood Free
Pork Free
Beef Free
No Preference

I'm still using the variety recipes because I still a newbie. When school starts I might go to the quick recipes for a while. Here is the good part, after you sign up you can edit the meals that are sent to you! If I have a repeat meal I just make sure to change it! So simple! 


Delivery
The easiest part! No driving anywhere or going into the grocery. No waiting in lines!
You can pick a delivery for Wednesday-Saturday. ***The day that you decide to have the food delivered changes the day that you need to make sure you have the recipes you want. So I change my recipes a few weeks before to make sure I don't forget.  You can also pause your deliveries so that if you aren't home one week, or you have plans you don't have to pay to get meals you won't use. You can pick to get meals once a month or every other week. It's totally up to you.

When the box is delivered it is packed with ice so that the food doesn't go bad. 


Cookin' Time
Each meal is packed in a different bag, labeled so you know which meal it is. There are also easy visual recipes that are easy to follow. I would say that each meal takes about 30 minutes to prepare (Remember I have the classic plan, variety meals, for 2) 

This is by far the easiest cooking experience I have ever had! Every meal is delicious and healthy! No more fast food. *Except for a McDonalds coke every once in a while* I have talked so many people into this new way of cooking. I feel so much better when I am eating Hello Fresh and I enjoy finding out what is going to come in my box every week! It's like a healthy at my door every week! 


*This post is not associated with Hello Fresh, this is my personal review and feelings.*
0
Powered by Blogger.
Back to Top