Slime


Who knew there could be so many choices when trying to make slime!?!? I thought that I would make a few different recipes with my little and show you the differences and of course our favorites! So here goes nothing... I give you 5 of our recipes and either a NO or GO. No matter what we had fun trying them all!  

Fluffy Slime
4oz Glue
Shaving Cream
1 TBS Contact Solution
Food Coloring 

To be really honest I just kind of eyeballed the whole recipe. I poured a whole bottle of glue into a small bowl. Then, added a few drops of food coloring. I mixed it together adding more food coloring until I got the color I wanted. I added the shaving cream into the bowl until it was full and started to mix. 

Once is it mixed it get's really sticky, that's when you need to add the contact solution. I started with 1 TBS and kept adding pollution until I felt that it was the right stickiness. 

Overall this recipe was super easy to make and smelled great. It was easy to clean up and kept really well in a ziplock bag. It was a GO from me. 


Glitter Slime
4oz Glitter Glue
1 TBS contact solution 
1/2 TBS Baking Soda

If you want a slime that's not really slimy but good for fine motor this recipe is for you! Dump the bottle of glitter glue into a bowl. Add 1 TBS of contact solution and 1/2 TBS of baking soda and mix it up. Done. It was super easy to make, it really has no smell, and it's not sticky or messy. The only down fall is that it's a little more expensive to make because of the glitter glue, and there is not a strong pull to it. It keeps well in a ziplock and we were able to play with it multiple times. Other than the minor things it was another GO from me. 

*You could do this with regular white glue and add food coloring and glitter*


Silly Putty Slime

1 Cup Cornstarch
1/2 Cup Dawn dish soap
Contact solution 

If you want to make a mess this recipe is for you! I felt like it was a disaster, but maybe I was doing it all wrong. I started with 1 cup of Cornstarch, added 1/2 cup of Dawn dish soap and mixed it together. You can see how clumpy it was I started adding contact solution until it had some form of slime consistency, I have no clue how much I added. Eventually it took it's shape but not after making a complete mess. I felt like it took me forever to get it right. I would say this is a NO from me.  You can't even get this in a ziplock to store it.... well you can but it's a MESS.

*If you know how to make this recipe and get it right, please let me know!*


Hair Conditioner Slime
1/2 Cup Conditioner
1 Cup Cornstarch
Food Coloring
Contact Solution 
This was definitely the easiest recipe for us to make!

I poured in the conditioner, cornstarch, and food coloring then mixed. I added a little bit of contact solution at a time until it was the consistence that I wanted and I was done! So super simple! It had a decent amount of stretch and strength which would be great for fine motor. I will say that it doesn't keep well. So you would have to make it and play with it immediately. Once I tried to take it out of the bag there was not hope for playing with it again. Maybe in a container it would have stayed better?  GO and NO


Borax Slime
No matter what the recipe this is always our favorite. Maybe because my little is old enough to know not to eat it so I don't panic about it. GOOOO

4 oz Glue
1/2 Water
1 Cup Water
1 teaspoon Borax Powder 
Food coloring, paint, or glitter 

Mix glue and 1/2 Cup water together in a small bowl. Add the coloring and/or glitter. In a separate bowl mix 1 teaspoon of Borax Powder and 1 cup Water together. Slowly combine the mixtures together. Stir really well and get in their with your hands to combine. If you have extra water, just pour it out. 


I am always looking for new slime recipes to try. If you have any tried and true recipes for me PLEASE let me know! This is one of my favorite things to do with my little! Happy Sliming! 


One day at a time...

My new motto going into this year... 

2017 was a rough one for me. Don't get my wrong I had a lot of good memories that helped me through the year but I also have a few rough ones. 2017 taught me about what's really important in life. I've always lived each day trying to make, create, print, and laminate the next best thing for my kiddos. I was wearing myself to the bone, going home exhausted and worn down. I hardly had energy for my own child let alone the 16 Special Education Students that needed just as much as he did. 

During the last 2 weeks I have done absolutely NOTHING that has to do with my classroom. This is a first. I have cleaned my house top to bottom and reorganized every room, drawer, and closet. I have started to redecorate bits and pieces of my house to reflect the new me and the journey that I hope to lead this year. 

Here is my point, short and sweet... IT CAN ALL WAIT!!! It's not that important. (*OK sometimes it is, like this IEP that I have to get done TODAY.) For the most part, the things that you have to get done aren't going to make your classroom crash and burn if it's not finished. Your day will go on, life will go on, your classroom will never know the difference. My point is to stop stressing about the small stuff and enjoy the moment. Your kids love for you to be present with them and not be all caught up in trying to keep up with the "Teaching Jones." Build those relationships instead, you will get more out of them by building relationships than throwing work and new activities at them everyday. They need to know that you care and are there for them and they will then move mountains for you even if you don't have the coolest new activity. 

Trust me when I say that my kiddos still have October Task cards in the work station. We will be doing the January pocket chart center in February, and we might be writing about snowmen in March but it doesn't matter. They are still learning each and every day. Stop stressing yourself out and be present in their lives each and everyday. They need you more than you will ever know. 

Happy New Year! 


Blowing Up Clipart in 10 Easy Steps

Now that I have shown you how to blow up your fonts, it's now time to blow up your favorite clipart. I know what you're thinking... 
"What? Why would I do that? What a waste of time!"

Let me give you a little background. About 5 years ago I decided I wanted a Hollywood themed classroom. (You can see that classroom here.) When I started that theme there were NO bulletin board sets that I loved that would match exactly what I wanted. So, I took clipart, blew it up on the poster maker, HAND COLORED IT, then laminated it for the wall. It was actually a lot of work. 

I would say 2 years ago I discovered blowing up clipart. DUH! How did I never think of this??? Yes, it still takes a little work but it's so fun! Especially when I don't want to drive 30 minutes to the closest teaching store,  and then I won't find what I want. Or searching online to find what I want and never finding it! 

So here you go, easy steps to blow up your clipart! 


1. Make sure you have purchased clipart from your favorite clipart artists. For this tutorial I went with Krista Wallden- Creative Clips. (Find her clipart here.)

2. Open up a blank Powerpoint document. Go to File > Page Setup. Change the width to 8.5 and the height to 11. This should make your page so that it is vertical and ready to print on normal paper.


3. You will then go to the Clipart file that you have downloaded. Choose 1 image and drag the image to a blank power point slide.


4. Continue adding 1 image per page until your have all your images in your powerpoint document. 


  5. Go back and resize all the images to the size you want. As you can see I made sure that the eraser was the smallest. The paper was the largest. *HINT: If you hold the SHIFT key when trying to resize images, it will make sure that you don't unevenly stretch the image.*

6. Now you need to save the document as a PDF. To do this go to File > Save As. Go down to File format on the bottom of the window. Click the drop down menu and choose PDF. This will then save your file correctly. 


7. Open your PDF in Adobe Acrobat Reader. ( I have the DC version that I downloaded for free). You will then go to File > Print. Click on the Paper Sizing & Handling where is says Poster. You will then change the Tile Scale percentage. I used 250. Then change the Overlap to 0.05. *You can adjust this however you wish. If you want your images bigger, or more/less overlap. Then just hit print! 


8. It will print, you will panic, and then it will be OK. It will look like a nightmare but I promise it will be easier than you think! First, sort each piece of clipart into its own pile. Then cut the pieces out 1 image at a time. I ALWAYS have the print screen open so I can see exactly where the pieces go after they are cut. *TIP- If you print only 1 image at a time, you can use the pages that didn't print anything on them, on the next printed image to save paper*


9. Piece the images together to make sure you have all the pieces! 


10. This is when you laminate, if you wish. If not then you can staple it together UP ON THE WALL, exactly where you want it. I promise it makes it so much easier!!!!! 

I hope that you find this helpful! If you have any questions please don't hesitate to ask me! I will be more than willing to help!!! Good Luck! 


10 Easy Steps to Blow up Fonts

One of my favorite things to do on an empty wall is blow up quotes! I'm here to show you a quick tutorial on how to blow up fonts and making a boring wall have a pop of excitement. 

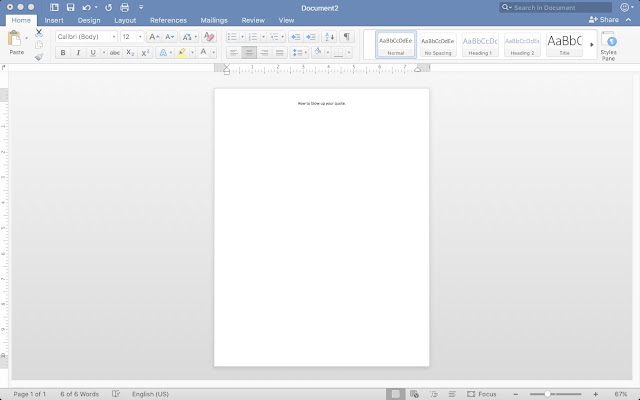
1. I find it the easiest to do this in Microsoft Word. Make sure to open up a new blank document and have your quote ready! 

 2. Your first step is to go into your Margin settings. From my computer I go to 
Layout> Margins> Narrow. This just gives you a little extra room to work with when blowing up your font. After you have your margins set to narrow, then type in your quote. 


3. Highlight your entire quote, and center it on the page. Once it is centered, change it into any font that you would like to use. For this tutorial I chose LD What did I say?. To download my Endless Growing Font Bundle click here


4. Then depending on the font that you pick you will now change the size of the font so that it fits 1 letter on each page. In this tutorial I used the size 650. In other fonts it might be smaller or larger. It also depends on how big you want your quote. 


5.  I then make sure that that there is one letter to each page. (If you are printing on white paper or all the same color paper, it doesn't matter if all the letters are all on one page. If you are making a rainbow quote you will want one letter on each page.) * You can change the size of 1 letter if it doesn't fit on the page completely. Sometimes I have to make my m and w's smaller than the other letters. 


6. You will then change the color of each letter to the color that you want the letter to be.  I use the font color button when changing the letter coloring. (The A with the purple color underneath)


If you are printing all on 1 paper color you can skip Step 7 and 8 and head directly to 9. If you are printing on rainbow paper this is going to be the most important part! 

7. Move all of the same color letters side by side. If you have some that will fit on the same page, put them together now. 


8. If you are printing on Rainbow paper you now need to count out how many pages you need for each color. This is very important! You also need to know your printer, I would have to personally start with purple on top but you might have to start with red on top. 

9. Select all of your text and go back up to the text buttons. Click on Text Effects, the white A with the blue outline. I think go Outline> and change the color to black. 


10. Now go back and change your font color to white using the font color button. 
(A with purple underneath)


10. We will change the outline of the font so that it is easier for you to cut out. This again will depend on the font that you have chosen and the thickness that you desire. Go up to the font buttons and click on the Text effects button. Go to Outline> Dashes> More Dashes. Then change the width of the dash to 10 pts. or the size of your choice. 

Just like that you are ready to print. Again know your printer and which color you need on top. If you are printing on white or all one color, you have it easy! I printed at least twice before I got all the letters right!

If you need help please email me and let me know how I can help! I hope this has been easy for you to follow and that it helps you give your classroom a wall popping quote! 

Powered by Blogger.
Back to Top